15 Dec Shading & drawing 3-dimensional forms – learn how to draw
If you want to be able to draw 3-dimensional objects realistically, you need to know about shading methods and how to create tones and values.
How to create tones and values:
With the different degrees of hardness/blackness of graphite pencils, both very light and very dark tones can be achieved. The softer the pencil (B Blackness), the darker the values. The harder the pencil (H Hardness), the lighter the values.

By blending different values you can create smooth transitions from light to dark.
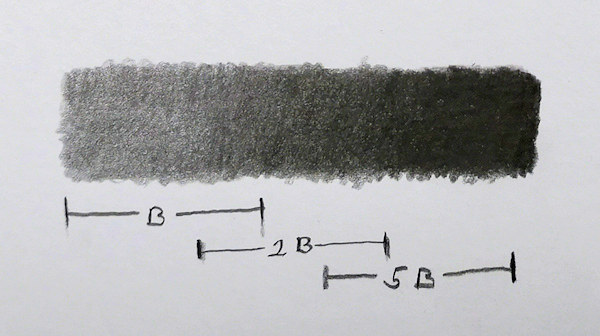
Here is an example: I started with a B pencil, continued with 2B and eventually used a 5B pencil to draw the darkest part. All areas overlap slightly to create a smooth transition.
Shading techniques:
By using different shading techniques numerous effects can be created.
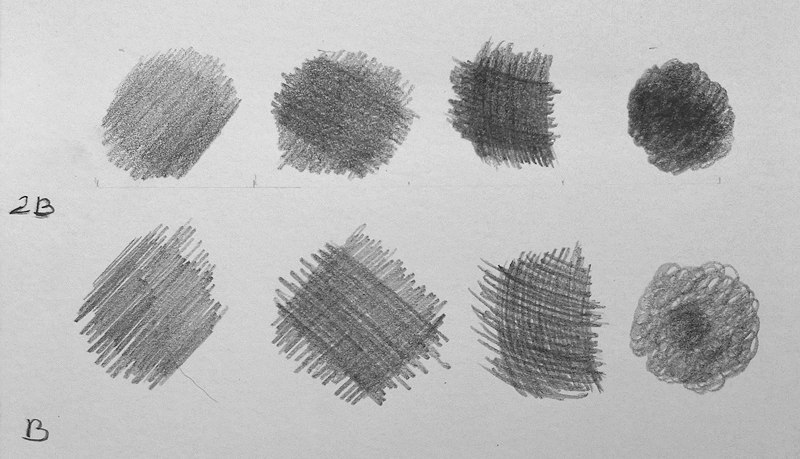
Here are the most common techniques:
1) hatching – basically drawing parallel lines
2) cross-hatching – crossing the lines
3) contour / cross contour (drawing curvesd lines) and
4) circles
I did a rough sketch, so you can see the pencil strokes better. The closer the strokes are together the more realistic the outcome. With additional blending (e.g. with blending stumps) you can create much smoother transitions and a very realistic drawing.
If you use contour lines it is very easy to draw 3-dimensinal shapes and forms. The most important round object you should be able to draw is the sphere:
How to draw a 3D sphere
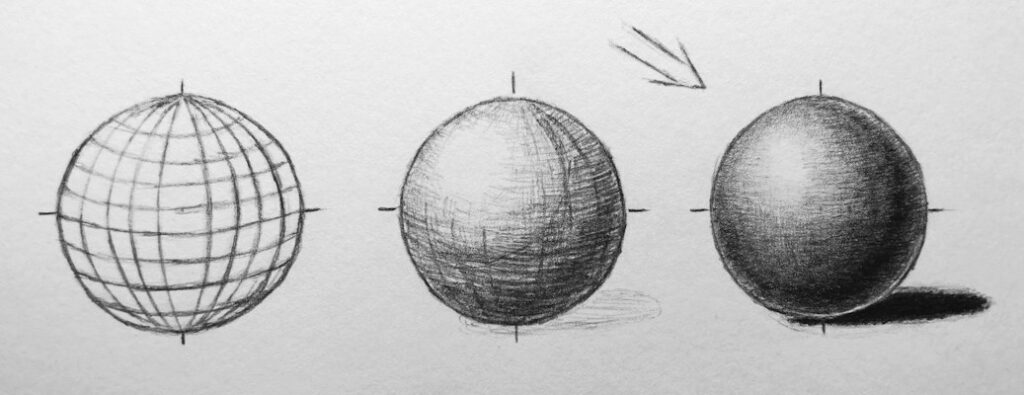
I started out by drawing a rough globe.
The vertical curved lines join at the top and at the lowest point. Parallel Contour lines run horizontally, therefore from left to right.
It is important to know where the light source is coming from. In this case, from the top left (slightly frontal).
Mark the highlights, the area where the light reflects the most.
Then you can continue to draw the contour lines from top to bottom and left to right.
Eventually, you can increase the contrast and draw finely hatched lines until they are barely visible.
I also added a drop shadow so the drawing looks more realistic.
The smoother you draw the gradients, the more realistic is the outcome.
In a realistic or photorealistic drawing you can ideally not see any individual pencil strokes.
How to draw a Cylinder/ Cup
A cylinder or a mug is also particularly suitable for practicing three-dimensional drawing:
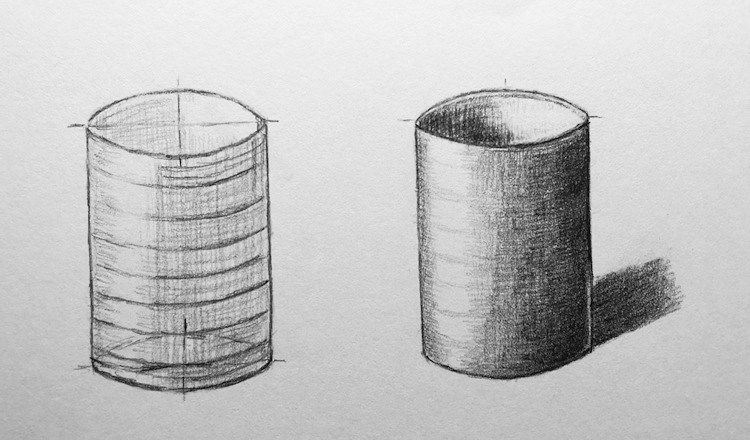
Initially, you can imagine a rectangle.
The lines always run parallel to each other.
Both the upper and lower oval surface (or the opening) have the same shape and are parallel to each other.
Check where the highlights are. Then you can draw the round shape with contour lines (horizontally) and straight lines from top to bottom vertically.
Eventually, you can increase the contrast by darkening the shadows and blending the transitions.
When you have no problems drawing those simple 3D objects you can move on to more challenging subjects.
